
Designing my tattoo using generative art in p5.js
While browsing the pinterest some time ago, I came across an image with funky, glitchy textures, which I thought would look cool as a tattoo. Sadly, I couldn't find the author, so I can't credit them here.
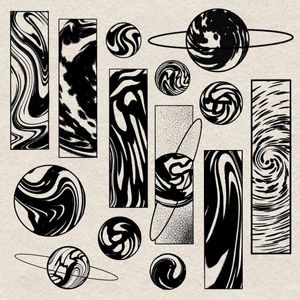
Since I have always wanted try my hand at genertive art after stumbling upon an excellent talk by Tim Holman, I decided to create a similar pattern using p5.js. By generating the art randomly, I could easily generate a ton of different patterns, and choose the best seed (surely the Paradox of Choice won't haunt me in the future).
Setting up p5.js
To start off, I created a new project using a Vite. By using it, I could get automatic refreshes of the page, and quickly preview my changes. Once that was done, I then created the basic canvas:
import "p5";

const height = 800;
const width = 400;
let canvas;

window.setup = function setup() {
    pixelDensity(1);
    canvas = createCanvas(width, height);
    imageMode(CENTER);
    noLoop();
}

window.draw = function draw() {
    background(255);
    fill(0);
    rect(100, 100, 200, 200);
}
Nothing too crazy yet, just a basic white canvas with a black square. I'll spare you from seeing the resulting image.
Drawing the basic shapes
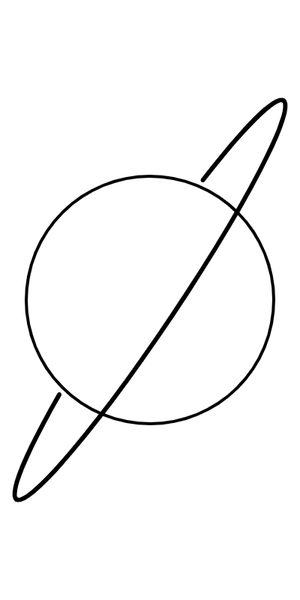
I aimed to create a minimalistic and abstract representation of a planet resembling Saturn. I tilted the ring, to better fit my forearm. To avoid the back side of the ring touching the planet in the middle, I had to divide the ring into three separate arcs. I used the formula that I found on the internet to calculate the necessary angle offset.
const rotation = -0.98079;
const strokeWidth = height * 4 / 800;
const circleWidth = width * 0.825;
const arcWidth = width * 1.6;
const arcHeight = height * 0.09;
const arcGap = arcWidth * 0.03;

window.draw = function draw() {
    background(255);
    noFill();

    translate(width/2, height/2);
    rotate(rotation);
    strokeWeight(strokeWidth);

    ellipse(0, 0, circleWidth);

    // front arc
    strokeWeight(strokeWidth * 1.5);
    arc(0, 0, arcWidth, arcHeight, 0, PI);

     // back arc
    let A, B;
    {
        const a = arcWidth, b = arcHeight, d = circleWidth + arcGap;
        A = a * Math.sqrt((d*d-b*b)/(a*a-b*b));
        B = b * Math.sqrt((a*a-d*d)/(a*a-b*b));
    }
    const rightHandAngle = Math.atan2(-B, A);
    const leftHandAngle = Math.atan2(-B, -A);
    arc(0, 0, arcWidth, arcHeight, rightHandAngle, TWO_PI);
    arc(0, 0, arcWidth, arcHeight, PI, leftHandAngle);
}
I'm defining all of the units in terms of canvas's width and height. This ensures that all proportions remain consistent, even after increasing the resolution of the image.
Adding the background
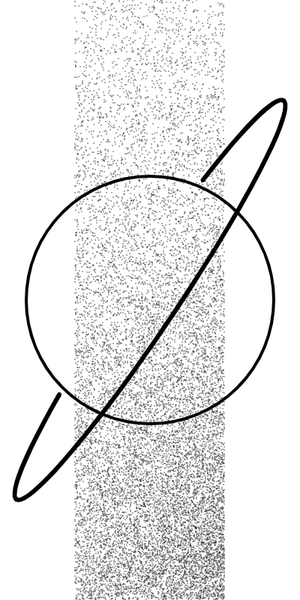
With the basic shapes in place, I proceeded to fill the background with a simple gradient. Since this design would eventually be inked on my skin, I didn't go for the linear gradient, and decided on building it up pixel-by-pixel to get a dotwork-like style.
I iterated over each pixel of the canvas and generated a random value.
I then checked if the value fell below the curve of some function of the distance from the bottom-right corner.
Because I wanted more concentration of dots near the bottom of the canvas, I used a simple function y = 0.4/(x+1)^4.
const rectWidth = width * 0.5;
const rectStartX = (width - rectWidth) / 2;
const rectEndX = width - rectStartX;

window.draw = function draw() {
    // snipped (canvas setup)

    const gradient = createGraphics(width, height);
    for (let y = 0; y < height; y++) {
        for (let x = rectStartX; x < rectEndX; x++) {
        let d = map(dist(x, y, width, height), 0, dist(0, 0, width, height), 0, 1);
        let frac = 0.4 / Math.pow(d + 1, 4);
        if (random() < frac) {
            gradient.point(x, y);
        }
    }
    const gradientImage = gradient.get();
    rotate(-rotation);
    image(gradientImage, 0, 0);
    rotate(rotation);

    // snipped (drawing of shapes)
}
As you can probably already imagine, this approach is very inefficient, especially as the resolution of the image increases. While shaders would have been ideal for this task, I opted to keep things simple. I'm unsure if this approach is statistically sound or if it may encounter issues with increased resolution, but it's good enough for my purposes.
The resulting image:
Generating the texture
Now comes the fun part—generating the actual texture!
I knew from the start that I wanted to add the Perlin noise into the design. However, I wasn't sure how to twist and distort it to make it more intriguing. After some Googling, I found this informative article by deconbatch, which demonstrated how to curl the noise using trigonometric functions. To be honest, I'm not entirely sure how it is working, nor how could someone come up with it in the first place.
Anyway, here is the code with slight adjustments:
window.draw = function draw() {
// snipped (background drawing)
const texture = filledTexture();
const circleMask = createGraphics(circleWidth, circleWidth);
circleMask.ellipse(circleMask.width / 2, circleMask.height / 2, circleWidth);
const textureImage = texture.get();
textureImage.mask(circleMask);
textureImage.filter(THRESHOLD);
image(textureImage, 0, 0, circleWidth, circleWidth);
// snipped (drawing of shapes)
}
function filledTexture() {
const w = 570, h = 360;
const cellW = 2, cellH = 2;
const nStep = 0.005;
const nPScale = 5;
const graphics = createGraphics(w, h);
graphics.background(0, 0, 0, 255);
graphics.noStroke();
for (let xx = 0; xx < graphics.width; xx += cellW) {
const x = map(xx, 0, graphics.width, 0, w);
const nX = x * nStep;
for (let yy = 0; yy < graphics.height; yy += cellH) {
const y = map(yy, 0, graphics.height, 0, h);
const nY = y * nStep;
const ddX = dist(x, y, w * 0.5, h * 0.5);
const ddY = dist(x, y, w * 0.5, h * 0.5);
const dx = cos(PI * ddX / w) * w;
const dy = sin(PI * ddY / h) * h;
const nP = dist(x, y, dx, dy) * nStep * nPScale;
const noiseValue = noise(nP, nX, nY);
let color = map(noiseValue, 0, 1, 0, 255);
if (color > 128) {
color = 255;
} else {
color = 0;
}
graphics.fill(color);
graphics.rect(xx, yy, cellW, cellH);
}
}
return graphics;
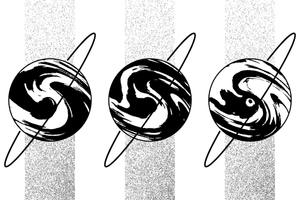
}Once again, we are unnecessarily wasting CPU cycles by calculating the corners of the texture, only to discard them afterwards. This code could also benefit from using shaders.
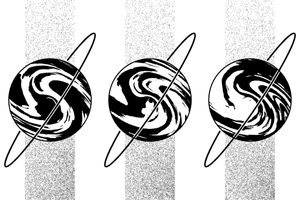
Since this image will be inked on my skin, I'm posterizing the noise values, which range from 0 to 1, into #000 and fff. Here are a few examples of the generated images:
Final touches
The front side of the ring is blending with our texture. To address this issue, we can make some final adjustments. First, we can draw a slightly larger white arc as a background to make it less visually busy. Additionally, we need to draw the gradient after the white arc to ensure it doesn't get erased. This requires masking the gradient so that it doesn't overlap with the central circle.
window.draw = function draw() {
    // snipped (texture)

    // front arc white background
    stroke(255)
    strokeWeight(strokeWidth * 1.5 * 2);
    arc(0, 0, arcWidth, arcHeight, 0, PI);
    stroke(0);
    strokeWeight(strokeWidth);

    const gradientMask = createGraphics(width, height);
    gradientMask.rect(rectStartX, 0, rectWidth, height);
    gradientMask.erase();
    gradientMask.ellipse(width / 2, height / 2, circleWidth);
    const gradientImage = gradient.get();
    gradientImage.mask(gradientMask);
    rotate(-rotation);
    image(gradientImage, 0, 0);
    rotate(rotation);

    // snipped (drawing of shapes)
}
And here are a few more images for your enjoyment:
Final result
Here is the image showcasing how the tattoo looks on my skin, after one month of healing, alongside the generated design:
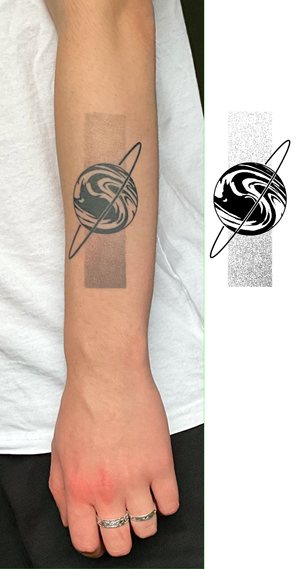
I apologize for not being able to capture its full glory. It can be challenging to take a picture of a tattoo with an iPad, without a tripod, especially on a gloomy day and without assistance.
I created a simple script using Playwright which saved a PNG image for approximately 100 seeds, which were meaningful words to me. The seed I used for a final design is świetliki, which means "fireflies" in Polish.
You can play with the generator yourself on tattoo.konradbochnia.com. The website includes additional features that helped me fine-tune the parameters.
I want to give big shotout to my tattoo artist, who provided many suggestions to make my design appear less cluttered.
Bonus A: Generating an animation
By introducing a small increment to the Perlin noise values for each frame, we can create a simple animation. To capture the frames, I utilized the canvas-capture library which provides a ZIP file containing the PNG images.
I guess this particular application of the Perlin noise won't be winning any Academy Awards. Now, if only I could get an E Ink display working under my skin...
Bonus B: Playing with colors
Currently, we are mapping the Perlin noise values, which range from 0 to 1, to either #000 or #fff.
We obviously don't have to do that, and we can use some other colors.
One approach is to generate colors randomly using a suitable color space like Oklab.
Another option is to utilize color palettes, such as the the method presented by Inigo Quilez.
I opted to map the Perlin noise values to simple color schemes that I found on Coolors. Here are a few examples:
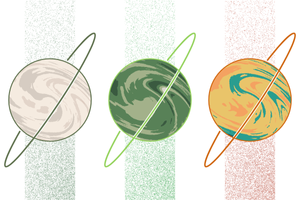
Honestly, I thought it would look a bit cooler :( I guess that's a good thing, I won't be needing to figure out how to install an LCD display into my skin.